Article

Investigation on the Case-Hardening Behavior of Additively Manufactured 16MnCr5

1
Institute of Photonic Technologies (LPT), Friedrich-Alexander-Universität Erlangen-Nürnberg (FAU), Konrad-Zuse-Straße 3/5, 91052 Erlangen, Germany
2
Erlangen Graduate School in Advanced Optical Technologies (SAOT), Friedrich-Alexander-Universität Erlangen-Nürnberg (FAU), Paul-Gordan-Straße 6, 91052 Erlangen, Germany
3
Schaeffler Technologies AG & Co. KG, Industriestraße 1-3, 91074 Herzogenaurach, Germany
4
H-O-T Härte- und Oberflächentechnik GmbH & Co. KG, Kleinreuther Weg 118, 90425 Nürnberg, Germany
*
Author to whom correspondence should be addressed.
Metals 2020, 10(4), 536; https://doi.org/10.3390/met10040536
Submission received: 2 April 2020 / Revised: 9 April 2020 / Accepted: 14 April 2020 / Published: 21 April 2020

Abstract

:
Additive manufacturing (AM) technologies, such as laser-based powder bed fusion of metals (PBF-LB/M), allow for the fabrication of complex parts due to their high freedom of design. PBF-LB/M is already used in several different industrial application fields, especially the automotive and aerospace industries. Nevertheless, the amount of materials being processed using AM technologies is relatively small compared to conventional manufacturing. Due to this, an extension of the material portfolio is necessary for fulfilling the demands of these industries. In this work, the AM of case-hardening steel 16MnCr5 using PBF-LB/M is investigated. In this context, the influences of different processing strategies on the final hardness of the material are studied. This includes, e.g., stress relief heat treatment and microstructure modification to increase the resulting grain size, thus ideally simplifying the carbon diffusion during case hardening. Furthermore, different heat treatment strategies (stress relief heat treatment and grain coarsening annealing) were applied to the as-built samples for modifying the microstructure and the effect on the final hardness of case-hardened specimens. The additively manufactured specimens are compared to conventionally fabricated samples after case hardening. Thus, an increase in both case-hardening depth and maximum hardness is observed for additively manufactured specimens, leading to superior mechanical properties.

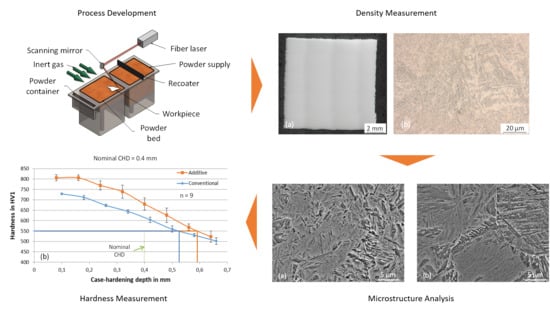
Graphical Abstract

1. Introduction

Sustainability, resource efficiency and energy efficiency are just some challenges modern industries need to face in the future [1]. These aspects can be satisfied at least partially by, e.g., improving the performance of products due to reduced weights, thus leading to lower energy consumption during usage. Additive Manufacturing (AM) technologies support the previously mentioned demands, as topology-optimized high-performance products can be produced using this manufacturing approach.

1.1. PBF-LB/M

Laser-based powder bed fusion of metals (PBF-LB/M) is an additive manufacturing technology characterized by the layer-wise generation of the final geometry by selectively melting and solidifying powdery materials [2]. This provides a unique possibility for industrial applications, as the high freedom of design supports the fabrication of highly complex components containing, e.g., lightweight support structures or inner cooling channels [3]. PBF-LB/M, often also referred to as selective laser melting (SLM) or laser beam melting (LBM), shows a high level of detail as small contours around 100 µm can be generated. An exemplary illustration of the iterative PBF-LB/M process is shown in Figure 1.
First, a layer of powder is applied on the substrate using a recoating mechanism. In the next step, this layer is selectively exposed to laser radiation, thus melting the material wherever required. Thirdly, the building platform is lowered, and the mentioned steps are repeated iteratively. After finishing the AM process, the final part is cut off the substrate and subsequent processing steps, such as removing support structures and surface polishing, are carried out.
In AM technologies, the melting process is highly dynamic due to the use of a laser beam as an energy source. Thus, high intensities and cooling rates in the order of 106 K/s can be observed during the production of parts [4]. These high cooling rates support the formation of a very fine microstructure compared to conventional manufacturing technologies such as, e.g., casting or forging [5,6]. In general, a finer microstructure is preferred to a coarser one, as small grains improve key material properties such as hardness, tensile strength and ductility by suppressing, or at least delaying, crack growth propagation [7]. The fast cooling of carbon-containing steels supports the formation of a fine martensitic structure [8] instead of an austenitic, bainitic or ferritic one when compared to conventional primary shaping processes [9]. This is desirable for the fabrication of ready-to-use components, as a subsequent heat treatment for the hardening of the final product is not necessarily required.
However, due to the close linkage of AM to laser welding, the processing of high carbon-containing steels is difficult, as hot cracks susceptibility increase with larger amounts of carbon. Thus, the available steel alloys for powder bed-based processes are not ideally suited for applications requiring high surface hardness and wear resistance, while also providing sufficient ductility.

1.2. Case-Hardening Steel 16MnCr5-1.7131

Case-hardening steels such as 16MnCr5 are typically characterized by a ductile material core and a hardened surface - the so-called case. By applying a subsequent heat treatment, also referred to as carburizing, an increase in carbon content is realized, leading to a corresponding growth in hardness and wear resistance [10]. Due to this, case-hardening steels, as defined in DIN 10084 [11], are very well suited for highly demanding applications in the field of gear, shaft and bearing technologies. For material hardness, values in the range of 250–400 HV1 can be achieved without carburizing [12]. However, case-hardened samples show a surface hardness of up to 800 HV1 and are characterized by a ductile core with a hardness of around 300 HV1 [10]. One critical parameter for surface hardening is the so-called case-hardening depth (CHD) describing the distance from the surface to an inboard point, for which the corresponding hardness does not fall below 550 HV1 [13]. For products made from 16MnCr5, the CHD value is typically in the range of 0.2–1.00 mm, depending on the holding time and temperature during carburizing. The present microstructure is also an influencing factor on case-hardening behavior, as a finer microstructure tends to reduce carbon diffusion into the material [10]. In contrast to conventional fabrication technologies, AM processes support the formation of a finer grain structure [14], thus requiring further investigation into the case-hardening behavior of additively manufactured specimens.
Subsequently, a tempering heat treatment is conducted to adjust the desired material properties. This step is typically carried out at around 180 °C for 2 h and is dependent upon the targeted hardness of the case [10]. Conventionally manufactured specimens are characterized by a tensile strength in the range of 880–1180 MPa and a yield strength of 635 MPa. The elongation at break can be found at values of 9% to 11%, depending on the diameter of the sample, according to Deutsche Edelstahlwerke [15].

1.3. Additive Manufacturing of 16MnCr5

The up-to-date additive manufacturing of 16MnCr5 has barely been investigated. Schmitt et al. [16] presented the first results on the processing of this steel using PBF-LB/M, showing high relative densities above 99.5% for a laser power of 200 W and a layer thickness of 30 µm. The volumetric energy density was set to 100 J/mm3, with a constant hatch distance and varying scanning speeds, though exact values are not stated. Subsequent hardness testing showed values in the range of 320–335 HV10, depending on the applied laser power and scan strategy. In his dissertation, Kamps [17] investigated the additive manufacturing of gear components made of 16MnCr5. For processing, the same layer thickness (H = 30 µm) was used. The laser power varied between 150 and 200 W, while scanning speed varied in the range of 600–1400 mm/s. For a scanning speed of 900 mm/s, a hatch distance of 70 µm and a laser power of 200 W, with relative densities above 99.5%, were observed for additively manufactured 16MnCr5 samples by means of optical analysis. Furthermore, Kamps investigated the effect of case hardening on the resulting hardness and CHD. As-built specimens were exposed to a stress relief heat treatment at 650 °C for 6 h prior to case hardening. Additionally, the effect of varying holding times during case hardening on CHD and the maximum hardness was studied. For the as-built components, a hardness of 330 HV10 was observed without additional hardening. By case hardening, values of up to 800 HV10 were detected. Stress relief heat treatment led to a finer grain and a reduction in hardness to about 235 HV10. Kamps also showed that there was no noticeable difference in the maximum hardness values for samples manufactured by additive or conventional manufacturing. Furthermore, additively fabricated samples showed a decrease in CHD by approximately 10%. According to Kamps, the finer microstructure, which is typically generated using AM technologies, might act adversely during case hardening, as the diffusion and propagation of carbon into the boundary layers is impeded. The aim of this work is to study the effect of different processing strategies on the resulting hardness and CHD of case-hardened specimens made from 16MnCr5 using PBF-LB/M. This includes a comparison between as-built as well as stress relief heat-treated and grain coarsening heat-treated specimens. Grain coarsening heat treatment is conducted based on the assumption that a coarser microstructure supports carbon diffusion. Finally, case hardening is conducted to increase the carbon content and, based on the resulting material hardness, the effect of the different strategies is evaluated.

2. Materials and Methods

Up to now, barely any experiments have been published on the processing of 16MnCr5 by means of PBF-LB/M and applying case-hardening strategies for increasing the material hardness. It can be assumed that the process-specific fine grain leads to improved material properties for additively manufactured specimens compared to conventional processing routes. In the present work, the effect of varying subsequent heat treatment strategies and case hardening on the resulting material hardness are examined. The obtained values for material hardness and CHD are finally compared to conventionally manufactured specimens that were case-hardened in the same batch. A schematic illustration of the experiments conducted in this work is presented in Figure 2.
In the first step (a), the process parameters for the defect-free fabrication of 16MnCr5 specimens were developed. As the base material, a gas-atomized 16MnCr5 powder produced by Nanoval GmbH & Co. KG in Berlin, Germany, with an average grain size (d50) of 29.2 µm, was used. The raw material for the atomization process was provided by Schaeffler AG. Particle size and distribution were analyzed using a Camsizer X2 (Microtrac Retsch GmbH, Haan, Germany). Additionally, optical microscopy was carried out to determine the size and shape of the particles. The experimental results of the powder characterization show the particle mass distribution Q3 (share of total mass is 10 %, 50 % and 90 %) for the analyzed powder to be 17.12 µm, 27.65 µm and 40.46 µm, respectively. An optical analysis of the powder indicates the primarily spherical shape of the base material, as illustrated in Figure 3 even though some irregularly shaped particles, as well as locally adhered particulates, can be found at the surface.
The nominal chemical composition of conventional 16MnCr5, according to DIN EN 10084, is listed in Table 1 [11]. Energy-dispersive X-ray spectroscopy (EDX) measurements show a slight increase in Mn compared to the standard. This might be due to the powder atomization process.
Furthermore, the carbon content of the base powder material was determined using a carbon analyzer ELEMENTEAC CS-I (ELTRA GmbH, Haan, Germany). The results show the carbon content to be around 0.164% ± 0.002%.
Specimens (10 × 10 × 10 mm3) were manufactured on a commercially available SLM 280 2.0 (SLM Solutions AG, Lübeck, Germany) machine equipped with a 400 W fiber laser and a nominal spot diameter of 78 µm in the focal plane. For the fabrication of the specimens, the layer thickness H was set constant at 40 µm. Using this layer thickness, the increase in build time compared to lower layer thicknesses is targeted, as time-consuming recoating steps are reduced. Substrate steel plates, which were previously sandblasted to increase the surface roughness, were used. The preheating temperature of the build platform was set to a constant value of 150 °C for all investigations. Laser power (PL), scanning speed (vs) and hatch distance (h) were altered. The analyzed range for the different factors is presented in Table 2.
Relative density was determined by means of optical microscopy on polished microsections. For this, several different planes in build direction, as well as different samples built with the same processing parameters, were analyzed. Then, the presented samples were cut into two halves in the middle region. The generated specimens were embedded in resin before being grinded (P240–P1200) and polished using a polishing agent with a grain size of 1 µm. Subsequently, microscope images, which are commonly used in validating additively manufactured cross-sections, were made to analyze the relative density. These pictures were converted into binary images and the bright (solid material) and dark (defects) pixels were related to each other, thus representing the relative density of the sample. This was done for numerous single images with a large magnification, which were then merged into one large image. Samples for further investigations were produced based on the most promising results regarding relative density. The additional etching of the samples using 1-% Nital was done for subsequent microstructural analysis.
In the second step (b), two different approaches for heat treating were followed. First, specimens were exposed to stress relief heat treatment (HTS1) at 680 °C for 2 h. Second, coarse grain annealing (HTS2) was conducted to support grain growth. The aim was to investigate whether a grain coarsening approach supports carbon diffusion during case hardening. All experiments were carried out in an argon atmosphere using a constant inert gas stream of 12 L/min. The processing chamber was flooded prior to heating.
In addition, as-built samples (HTS0) were fabricated and were used as a reference if no heat treatment was applied. The heating rate was kept constant at 5 K/min, while the cooling was carried out in the oven for all specimens. The investigated parameters are listed in Table 3.
The next step (c) covers several different approaches for case hardening. In this case, three different strategies were investigated. As a reference, a commonly used heat treatment strategy for achieving a CHD of 0.4 mm (CHS4) for 16MnCr5 was used. Additionally, the effect of shorter and longer holding periods, aimed at CHDs of 0.3 mm (CHS3) and 1.0 mm (CHS10), were studied. For the sake of comparison, conventional specimens were also placed in the carburizing oven to allow for the comparison of additively and conventionally manufactured specimens of the same batch. The case hardening was done by H-O-T Härte- und Oberflächentechnik GmbH & Co. KG (Nuremberg, Germany) in a carbon atmosphere. The different parameters for the applied heat treatment strategies are presented in Table 4. The holding time for different case-hardening strategies depended on the targeted case-hardening depth. All samples were annealed for 2 h at 180 °C after carburizing. For every set of parameters, three specimens were built. This led to a total of 27 samples for each CHD, divided into the nine analyzed approaches for improving CHD and material hardness.
In the end (d), hardness measurements were carried out for the determination of material hardness and CHD. The case-hardened samples produced in step (c) were, again, metallographically prepared for hardness testing. Hardness measurements were carried out using a semi-automatic hardness testing device, KB 30S, produced by KB Prüftechnik GmbH, Hochdorf-Assenheim, Germany. For the sake of comparability to the literature, HV1 was used as the testing load. To determine CHD, seven measurement points per sample were set at distances of 0.2, 0.4, 0.6, 0.8, 1.0, 1.2 and 1.4 times the nominal CHD each in z-direction. The offset in the x-direction was set to values larger than 300 µm, avoiding interfering effects between measurement points due to the overlapping of the diamond tip spots. The measurement of CHD was carried out three times per specimen. Additionally, three measurement points were placed in the center of the sample to determine the corresponding core hardness. A total of 24 measurement points is summarized and illustrated in Figure 4 for better understanding.
Furthermore, the hardness of conventionally fabricated reference samples was measured by H-O-T, assuring the suitability of the selected case-hardening parameters. The reference sample was purchased as a bar stock from Günther + Schramm GmbH, Oberkochen, Germany.

3. Results and Discussion

3.1. Identification of Suitable Parameter Range

Appropriate parameters are characterized by a relative density > 99.7%, ideally only showing small internal defects, like cracks (if existent). For the investigated parameter sets, relative densities between 99.3% (e.g., PL = 300 W; H = 40 µm, h = 160 µm, vs = 650 mm/s), with comparably large pores, and 99.9% (PL = 300 W; H = 40 µm, h = 120 µm, vs = 850 mm/s) could be observed. The latter parameter combination appears to be the most suitable one for the fabrication of specimens, as the highest relative density was observed. Microscope images of the rectangular specimen are shown in Figure 5. The size of the largest defects detected by means of optical analysis was in the order of 50 µm. On the outer edge of the specimens, some minor defects, such as small pores, could be observed in the manufactured samples. However, this is not considered critical, as the application of a subsequent case-hardening strategy requires the machining of the part surface before parts made of 16MnCr5 can be used for, e.g., gear applications.
Etching of the cross-section shows a primary martensitic microstructure with areas characterized by small amounts of retained austenite. Forthcoming experiments were conducted based on this parameter set, as it appears to be promising for the fabrication of nearly defect-free specimens made of case-hardening steel 16MnCr5. This is important, as internal defects can act as crack initiators, as it was already shown for different metallic materials in [18,19].

3.2. Determination of Mechanical Hardness and Case-Hardening Depth

In this step, the results for various CHDs are provided for both conventionally and additively manufactured specimens. The corresponding figures illuminate the most promising approaches for as-built samples without additional microstructure modification, as well as the different heat treatment strategies. Hardness measurements for untreated, additively manufactured specimens show a typical hardness of around 357 ± 19 HV1. This increase, compared to conventional samples which show typical hardness values of around 300 HV1, is the result of a finer grain structure due to the ultra-high cooling rates of AM processes of up to 106 K/s [4]. For case hardening (Figure 6), an increase in maximum hardness for the first measurement points compared to conventional specimens can be identified for all investigated specimens.
For low CHDs (CHS3 and CHS4), the difference is approximately 70–80 HV1 for the tested samples (805 ± 14 HV1 for Additive and 728 ± 4 HV1 for Conventional, CHS4). This trend increases for larger CHDs, as the difference in hardness rises to approximately 150 HV1 in boundary layers for a CHS10. Furthermore, an increase in CHD for additively manufactured specimens can be identified for larger nominal CHDs. For a targeted CHD of 0.4 mm (CHS4), a CHD of 0.59 mm was measured for additively manufactured samples; meanwhile, the CHD for conventionally fabricated samples was determined to be around 0.52 mm. This accounts for an increase of approximately 13.5 % in CHD.
This difference is hardly noticeable for lower CHDs (0.3 mm), as no clear trend towards the nominal line can be observed. Hardness values in the core of the different samples were identified to be around 376 ± 8 HV1 (CHS3), 375 ± 8 HV1 (CHS4) and 428 ± 22 HV1 (CHS10), respectively. Here, a rise in core hardness between 25% and 35% per sample could be observed compared to conventional test pieces. This increase might be attributable to the fine microstructure formed, as shown in Figure 7. Furthermore, it can be assumed that smaller amounts of carbon diffused into the core, thus leading to a slight increase in hardness. However, for the validation of this hypothesis, the tracking of the carbon content is elementary.
Here, a fine morphology for both cross-sections can be assumed. As expected, the as-built state and case-hardened state leads to a fine microstructure both in the case (a) and in the core (b), even though the samples were exposed to excessive temperatures during carburization.
In summary, in contrast to Kamps, an increase in hardness and CHD for additively manufactured samples compared to conventional ones was observed. Potential reasons for this could be the fact that the temperatures increased to 930 °C during carburization in the presented experiments, compared to 900 °C seen in the studies by Kamps. Furthermore, a reduction in grain size might be another reasonable explanation. These beneficiary hardness values could also occur due to carbide formation, the presence of internal stresses or the lower content of retained austenite. Further studies to determine these influences are necessary and will be carried out in future works.

3.3. Evaluation of the Influence of Different Heat Treatment Strategies

In this step, the influences of the varying strategies on microstructure modification are illustrated. The results of an exemplary nominal CHD of 0.4 mm are presented in Figure 8.
Here, a decrease in nominal hardness and case-hardening depth can be observed for approaches aiming to develop a coarser microstructure. Furthermore, stress relief heat treatment led to a reduction in hardness and CHD, as a decrease in CHD by approximately 12 % is detectable. This effect can be attributed to the removal of internal stresses via the application of this heat treatment strategy. However, a more homogeneous hardness distribution is detectable as the average standard deviation decreased from ± 23.7 HV1 to ± 16.4 HV1. According to Figure 9a finer microstructure is formed for the as-built state (Figure 9a) compared to the longer martensitic needles for specimens exposed to grain-coarsening heat treatment (Figure 9b).
However, even though an increase in carbon content can be assumed due to better diffusion effects [10], no correlated increase in hardness is detectable. In contrast, decreased values for hardness were measured. Apparently, microstructure formation, especially grain growth, is more critical for the resulting material hardness than a slight increase in carbon content due to better diffusion processes. This appears to be similar to results presented by Muszka et al. [20], as they observed an increase by up to almost 25 % in tensile strength in micro-alloyed steel by simply reducing the grain size. This effect is also recognizable for the other investigated CHDs (CHS3 and CHS10), as the nominal hardness and CHDs are larger compared to conventional samples, even though the grain coarsening heat treatment was conducted. However, further microstructure analyses to determine grain size and the content of retained austenite using, e.g., X-ray diffraction (XRD) measurements, or determining the carbon distribution in different areas, are required in order to fully understand the underlying mechanisms.

4. Conclusions and Outlook

In this study, the effects of different case-hardening and microstructure modification strategies on the resulting material hardness and case-hardening depth of additively manufactured 16MnCr5 were investigated. Parameters for defect-free processing of the mentioned case-hardening steel were developed, characterized by a high relative density above 99.9%. Finally, samples were fabricated to determine the effects of case hardening on additively produced components.
The increase in material hardness for additively manufactured specimens (805 ± 14 HV1) compared to conventionally manufactured ones (728 ± 4 HV1) can be attributed to the fine grain in the material, also leading to an increase in case-hardening depth by approximately 13.5 % for CHS4. Thus, additively produced parts of 16MnCr5 can possess superior material properties after carburizing. It is evident that the process-specific fine grain size was barely affected by stress relief heat treatment. Grain coarsening heat treatment negatively impacts material hardness. Here, it is assumed that the positive effects of fine grain formation due to AM-specific high cooling rates during solidification were negated by subsequent grain coarsening strategies and could not be counteracted by an improved carbon diffusion. Furthermore, additively manufactured specimens show a higher material hardness, as well as a larger CHD, due to fine grain formation hindering displacements in the solid material. Based on these results, two different conclusions can be drawn. On the one hand, a potential reduction in case-hardening time can be targeted, as the threshold values for CHD in additively manufactured specimens are generally reached faster compared to conventionally fabricated ones. On the other hand, the increased hardness and CHD can be seen as an additional safety factor during product and process development, as a higher hardness is achieved.
In another study, carbide formation, grain size development and formation, as well as the influence of internal stresses on material hardness, will be investigated. Furthermore, an analysis of the carbon diffusion and distribution throughout the case will be done in order to determine the carbon propagation into the material.

Author Contributions

Conceptualization, D.B., I.P., C.M. and M.S.; investigation, D.B., J.K. and F.K., methodology, D.B.; resources, C.M., F.K. and M.S.; supervision, M.S.; writing-original draft, D.B.; writing-review & editing, I.P., C.M. and M.S. All authors have read and agreed to the published version of the manuscript.

Funding

Funded by Schaeffler Technologies AG & Co. KG.

Acknowledgments

This work was supported by the Schaeffler Hub for Advanced Research at Friedrich–Alexander University Erlangen–Nürnberg (SHARE at FAU). The authors gratefully acknowledge the support provided by the Erlangen Graduate School in Advanced Optical Technologies.

Conflicts of Interest

The authors declare no conflict of interest.

References

  1. Riecke, M.; Teipel, F. Econsense Resource Efficiency Challenge; Econsense–Forum for Sustainable Development of German Business: Berlin, Germany, 2012. [Google Scholar]
  2. Gibson, I.; Rosen, D.W.; Stucker, B. Additive Manufacturing Technologies; Springer: Boston, MA, USA, 2010; ISBN 978-1-4419-1119-3. [Google Scholar]
  3. Emmelmann, C.; Sander, P.; Kranz, J.; Wycisk, E. Laser additive manufacturing and bionics: Redefining lightweight design. Phys. Procedia 2011, 12, 364–368. [Google Scholar] [CrossRef] [Green Version]
  4. Hooper, P.A. Melt pool temperature and cooling rates in laser powder bed fusion. Addit. Manuf. 2018, 22, 548–559. [Google Scholar] [CrossRef]
  5. Tian, L.; Guo, Y.; Li, J.; Xia, F.; Liang, M.; Bai, Y. Effects of solidification cooling rate on the microstructure and mechanical properties of a cast Al-Si-Cu-Mg-Ni piston alloy. Materials 2018, 11, 1230. [Google Scholar] [CrossRef] [PubMed] [Green Version]
  6. Gorsse, S.; Hutchinson, C.; Gouné, M.; Banerjee, R. Additive manufacturing of metals: A brief review of the characteristic microstructures and properties of steels, Ti-6Al-4V and high-entropy alloys. Sci. Technol. Adv. Mater. 2017, 18, 584–610. [Google Scholar] [CrossRef] [PubMed] [Green Version]
  7. Morris, J.W. The Influence of Grain Size on the Mechanical Properties of Steel; Lawrence Berkeley National Laboratory: Berkeley, CA, USA, 2001. [Google Scholar]
  8. Qiao, Z.X.; Liu, Y.C.; Yu, L.M.; Gao, Z.M. Effect of cooling rate on microstructural formation and hardness of 30CrNi3Mo steel. Appl. Phys. A Mater. Sci. Process. 2009, 95, 917–922. [Google Scholar] [CrossRef]
  9. Van Bohemen, S.M.C.; Sietsma, J. The kinetics of bainite and martensite formation in steels during cooling. Mater. Sci. Eng. A 2010, 527, 6672–6676. [Google Scholar] [CrossRef]
  10. Liedtke, D. Merkblatt 452“Einsatzhärten”; Wirtschaftsvereinigung Stahl: Düsseldorf, Germany, 2008. [Google Scholar]
  11. Deutsches Institut für Normung. Einsatzstähle—Technische Lieferbedingungen; Deutsches Institut für Normung : Berlin, Germany, 2008; DIN EN 10084:2008-06. [Google Scholar]
  12. Sobottka, G. Case-Hardening Steels; Edelstahl Witten-Krefeld GmbH: Krefeld, Germany, 1999. [Google Scholar]
  13. International Organization for Standardization. Steel—Determination of the Thickness of Surface-Hardened Layers; ISO 18203:2016(en); International Organization for Standardization: Geneva, Switzerland, 2016. [Google Scholar]
  14. Song, B.; Zhao, X.; Li, S.; Han, C.; Wei, Q.; Wen, S.; Liu, J.; Shi, Y. Differences in microstructure and properties between selective laser melting and traditional manufacturing for fabrication of metal parts: A review. Front. Mech. Eng. 2015, 10, 111–125. [Google Scholar] [CrossRef]
  15. Deutsche Edelstahlwerke GmbH. Lieferzustand, Technische Bezeichnungen, Normen-1.7131 Datasheet; Deutsche Edelstahlwerke GmbH: Krefeld, Germany, 2016. [Google Scholar]
  16. Schmitt, M.; Schlick, G.; Seidel, C.; Reinhart, G. Examination of the processability of 16MnCr5 by means of laser powder bed fusion. Procedia CIRP 2018, 74, 76–81. [Google Scholar] [CrossRef]
  17. Kamps, T. Leichtbau von Stirnzahnrädern aus Edelstahl Mittels Laserstrahlschmelzen. Ph.D. Thesis, Technische Universität München, München, Germay, 2018. [Google Scholar]
  18. Liverani, E.; Toschi, S.; Ceschini, L.; Fortunato, A. Effect of selective laser melting (SLM) process parameters on microstructure and mechanical properties of 316L austenitic stainless steel. J. Mater. Process. Technol. 2017, 249, 255–263. [Google Scholar] [CrossRef]
  19. Koutiri, I.; Pessard, E.; Peyre, P.; Amlou, O.; De Terris, T. Influence of SLM process parameters on the surface finish, porosity rate and fatigue behavior of as-built Inconel 625 parts. J. Mater. Process. Technol. 2018, 255, 536–546. [Google Scholar] [CrossRef]
  20. Muszka, K.; Majta, J.; Bienias, Ł. Effect of grain refinement on mechanical properties of microalloyed steels. Metall. Foundry Eng. 2006, 32, 87. [Google Scholar] [CrossRef] [Green Version]
Figure 1. Machine set-up for powder bed fusion of metals (PBF-LB/M) (a); iteratively repeated processing steps (b).
Metals 10 00536 g001
Figure 2. Experimental approach for the investigation of case-hardening behavior of additively manufactured 16MnCr5.
Metals 10 00536 g002
Figure 3. Experimentally determined shape of 16MnCr5 powder (a) via optical imaging and particle size distribution (b) via Camsizer, provided by FIT AG, Lupburg, Germany.
Metals 10 00536 g003
Figure 4. Selection of measurement points for determination of case-hardening depth (CHD) and core hardness.
Metals 10 00536 g004
Figure 5. Cross-section of test sample used for density measurements (a) and a magnified etched cross-section of the same sample (b). Used additive manufacturing parameters: PL = 300 W; H = 40 µm, h = 120 µm, vs = 850 mm/s.
Metals 10 00536 g005
Figure 6. Comparison of CHD over hardness for conventionally and additively manufactured specimens ((a) CHD = 0.3 mm; (b) CHD = 0.4 mm; (c) CHD = 1.0 mm), no heat treatment strategy.
Metals 10 00536 g006
Figure 7. Chemically etched microstructure of as-built and case-hardened specimen (a) and grain-coarsened and case-hardened specimen in the core region (b). Used additive manufacturing parameters: PL = 300 W; H = 40 µm, h = 120 µm, vs = 850 mm/s.
Metals 10 00536 g007
Figure 8. Effect of different heat treatment strategies on CHD and the corresponding material hardness. HTS0 + CHS4 represents the as-built state without heat treatment, HTS1 + CHS4 is stress relief treated (680 °C, 2 h) before case hardening and HTS2 + CHS4 is the material exposed to coarse grain annealing (1050 °C, 6 h) prior to case hardening. Used additive manufacturing parameters: PL = 300 W; H = 40 µm, h = 120 µm, vs = 850 mm/s.
Metals 10 00536 g008
Figure 9. Chemically etched microstructure at the inner boundary of nominal CHD (= 0.4 mm) for (a) as-built state (a) and grain-coarsening heat treatment before case hardening (b), magnification x10.000. Used additive manufacturing parameters: PL = 300 W; H = 40 µm, h = 120 µm, vs = 850 mm/s.
Metals 10 00536 g009
Table 1. Chemical composition of 16MnCr5 according to DIN EN 10084 [11] and measured by means of energy-dispersive X-ray spectroscopy (EDX).
Elemental RangeElemental Composition
CSiMnCrSP
Min.0.14-1.00.8--
Max.0.190.141.31.10.040.025
EDXNot detectable0.17 ± 0.021.33 ± 0.031.03 ± 0.0100
Table 2. Investigated processing parameters for the fabrication of 16MnCr5 specimens using PBF-LB/M.
ParameterParameter Range
Laser power (PL) [W]250–300
Scanning speed (vs) [mm/s]600–1000
Hatch distance (h) [µm]120–160
Table 3. Heat treatment strategies and corresponding parameters for tempering (HTS1) and coarse grain annealing (HTS2).
Heat Treatment StrategyTemperature [°C]Holding Time [h]Heating Rate [K/min]Cooling
HTS0Resembles the as-built state
HTS168025Oven cooling
HTS2105065Oven cooling
Table 4. Detailed listing of the applied case-hardening strategies, which were carried out at H-O-T in Nuremberg.
Case-Hardening StrategyTemperature [°C]Austenitizing Temperature [°C]Nominal CHD [mm]Annealing
CHS3900–950820–8600.3180 °C, 2 h
CHS4900–950 820–8600.4180 °C, 2 h
CHS10900–950 820–8601.0180 °C, 2 h