Next Issue
Volume 6, June
Previous Issue
Volume 6, February


J. Manuf. Mater. Process., Volume 6, Issue 2 (April 2022) – 22 articles

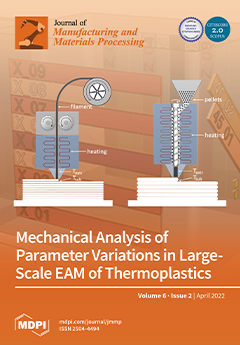
Cover Story (view full-size image): Large structural parts produced by extrusion additive manufacturing (EAM) are limited by strong anisotropy due to insufficient bond formation and reduced molecular entanglement along the layer interface. A simple testing methodology is introduced to improve the understanding of the correlation between process and material parameters and to enable digital modeling of EAM. This study focuses on the interactions between layer height and substrate temperature due to different layer times in high-volume additive extrusion manufacturing, as determined by tensile tests in which changes in substrate temperature had a greater effect. The methodology of this study can be used as a benchmark method to qualify new thermoplastic polymers for EAM processes and to determine optimal process parameters for improved melt bonding. View this paper.
  • Issues are regarded as officially published after their release is announced to the table of contents alert mailing list.
  • You may sign up for e-mail alerts to receive table of contents of newly released issues.
  • PDF is the official format for papers published in both, html and pdf forms. To view the papers in pdf format, click on the "PDF Full-text" link, and use the free Adobe Reader to open them.
Order results
Result details
Select all
Export citation of selected articles as:
11 pages, 2131 KiB  
Article
Enhanced Abrasion Resistance of Spark Plasma Sintered and HVOF Sprayed Hadfield High Manganese Steel by Turning and Diamond Smoothing
by Thomas Lindner, Hendrik Liborius, Bianca Preuß, Niclas Hanisch, Andreas Schubert and Thomas Lampke
J. Manuf. Mater. Process. 2022, 6(2), 48; https://doi.org/10.3390/jmmp6020048 - 17 Apr 2022
Cited by 4 | Viewed by 3148
Abstract
Austenitic high-manganese steels (HMnS) offer very high wear resistance under dynamic loading due to their high work hardening capacity. However, resistance to static abrasive loading is limited. Various approaches to increasing abrasion resistance are known from traditionally manufactured metallurgical components. These confirm the [...] Read more.
Austenitic high-manganese steels (HMnS) offer very high wear resistance under dynamic loading due to their high work hardening capacity. However, resistance to static abrasive loading is limited. Various approaches to increasing abrasion resistance are known from traditionally manufactured metallurgical components. These confirm the high potential for surface protection applications. In this work, the powder of the Hadfield HMnS X120Mn12 is prepared and processed by high-velocity oxy-fuel (HVOF) spraying and spark-plasma sintering (SPS). A good correlation was observed between the results of the HVOF and SPS specimen. Different surface conditions of the coatings and the sintered specimens were prepared by machining. Compared to the polished state, turning and diamond smoothing can increase the surface hardness from 220 HV to over 700 HV significantly. Regardless of the surface finish condition, similar good wear resistance can be demonstrated due to strong work hardening under sliding and reciprocating wear loading. In contrast, the finish machining process clearly influences abrasion resistance in the scratch test with the best results for the diamond smoothed condition. Especially against the background of current trends toward alternative coating systems, the presented results offer a promising approach for the development of HMnS in the field of coating technology. Full article
(This article belongs to the Special Issue Surface Integrity in Machining and Post-processing)
Show Figures

Figure 1

13 pages, 3297 KiB  
Article
Deformation Heating and Temperature Changes in a Near-β Titanium Alloy during β-Processed Forging
by Tomonori Kitashima and Lingjian Meng
J. Manuf. Mater. Process. 2022, 6(2), 47; https://doi.org/10.3390/jmmp6020047 - 15 Apr 2022
Cited by 2 | Viewed by 2927
Abstract
We investigated the temperature increase caused by heat generation from plastic deformation during β-processed forging in a near-β titanium alloy, Ti-17 alloy (Ti-5Al-2Sn-2Zr-4Cr-4Mo, wt%), by inserting thermocouples into large workpieces (100 mm in diameter and 50 mm in height). The workpiece was initially [...] Read more.
We investigated the temperature increase caused by heat generation from plastic deformation during β-processed forging in a near-β titanium alloy, Ti-17 alloy (Ti-5Al-2Sn-2Zr-4Cr-4Mo, wt%), by inserting thermocouples into large workpieces (100 mm in diameter and 50 mm in height). The workpiece was initially heated and held at 1193 K (920 °C) in the single-β region. It was subsequently forged between hot dies in surrounding heaters at a compression percentage of 75% at strain rates of 0.05 and 0.5 s−1 at 1023–1123 K in the (α + β) region. At 0.05 s−1, the temperature logarithmically increased by 39 K in 28 s for 1023 K; it increased by 30 K in 28 s for 1073 K. However, at 0.5 s−1, the material temperature increased, in 3 s, beyond or close to the β-transus temperature during forging at 1023 and 1073 K. In addition, as the forging temperature decreased, the increase in material temperature moderated, resulting in a difference of 27 K in the last forging stage, between the conditions of 1023 and 1073 K. This would reduce the temperature difference effect on microstructure formation during β-processed forging. Full article
Show Figures

Figure 1

31 pages, 10406 KiB  
Article
A Methodology for Tribo-Mechanical Characterization of Metallic Alloys under Extreme Loading and Temperature Conditions Typical of Metal Cutting Processes
by Afonso V. L. Gregório, Tiago E. F. Silva, Alcino P. Reis, Abílio M. P. de Jesus and Pedro A. R. Rosa
J. Manuf. Mater. Process. 2022, 6(2), 46; https://doi.org/10.3390/jmmp6020046 - 13 Apr 2022
Cited by 3 | Viewed by 2952
Abstract
The present paper proposes a combined tribo-mechanical methodology for assessing friction under conditions representative of metal cutting, without resorting to machining process monitoring. The purpose is to withdraw the size effect’s contribution due to tool edge radius to the well-known overestimation of the [...] Read more.
The present paper proposes a combined tribo-mechanical methodology for assessing friction under conditions representative of metal cutting, without resorting to machining process monitoring. The purpose is to withdraw the size effect’s contribution due to tool edge radius to the well-known overestimation of the friction coefficient. Comparative numerical analysis of several tribological tests led us to conclude that the ring compression test is one of the most suitable for reproducing the frictional conditions at the chip–tool interface. Two distinct metallic alloys were selected to demonstrate the application of the proposed methodology (UNS L51120 lead alloy and 18Ni300 maraging steel in conventional and additively manufactured conditions). The results help to better explain the influences of process parameters on the friction coefficient value under high temperature and high strain rate conditions. Results showed a typical increase in the coefficient of friction of up to 20% due to both temperature and strain rate parameters for 18Ni300. The results are of interest because they allow considering potential sources of error in the numerical simulation of metal cutting when the same friction coefficient value is considered for a wide range of cutting parameters. Full article
(This article belongs to the Special Issue Advances in Modelling of Machining Operations)
Show Figures

Figure 1

16 pages, 3374 KiB  
Article
Green Bioprinting with Layer-by-Layer Photo-Crosslinking: A Designed Experimental Investigation on Shape Fidelity and Cell Viability of Printed Constructs
by Ketan Thakare, Laura Jerpseth, Zhijian Pei and Hongmin Qin
J. Manuf. Mater. Process. 2022, 6(2), 45; https://doi.org/10.3390/jmmp6020045 - 9 Apr 2022
Cited by 5 | Viewed by 3567
Abstract
Process variables of bioprinting (including extrusion pressure, nozzle size, and bioink composition) can affect the shape fidelity and cell viability of printed constructs. Reported studies show that increasing extrusion pressure or decreasing nozzle size would decrease cell viability in printed constructs. However, a [...] Read more.
Process variables of bioprinting (including extrusion pressure, nozzle size, and bioink composition) can affect the shape fidelity and cell viability of printed constructs. Reported studies show that increasing extrusion pressure or decreasing nozzle size would decrease cell viability in printed constructs. However, a smaller nozzle size is often necessary for printing constructs of higher shape fidelity, and a higher extrusion pressure is usually needed to extrude bioink through nozzles with a smaller diameter. Because values of printing process variables that increase shape fidelity can be detrimental to cell viability, the optimum combination of variables regarding both shape fidelity and cell viability must be determined for specific bioink compositions. This paper reports a designed experimental investigation (full factorial design with three variables and two levels) on bioprinting by applying layer-by-layer photo-crosslinking and using the alginate-methylcellulose-GelMA bioink containing algae cells. The study investigates both the main effects and interaction effects of extrusion pressure, nozzle size, and bioink composition on the shape fidelity and cell viability of printed constructs. Results show that, as extrusion pressure changed from its low level to its high level, shape fidelity and cell viability decreased. As nozzle size changed from its low level to its high level, shape fidelity decreased while cell viability increased. As bioink composition changed from its low level (with more methylcellulose content in the bioink) to its high level (with less methylcellulose content in the bioink), shape fidelity and cell viability increased. Full article
Show Figures

Figure 1

23 pages, 16597 KiB  
Article
Development of In-Process Temperature Measurement of Grinding Surface with an Infrared Thermometer
by Yukio Ito, Yoshiyuki Kita, Yoshiya Fukuhara, Mamoru Nomura and Hiroyuki Sasahara
J. Manuf. Mater. Process. 2022, 6(2), 44; https://doi.org/10.3390/jmmp6020044 - 8 Apr 2022
Cited by 5 | Viewed by 3133
Abstract
Heat generation is a critical issue in grinding. If the grinding point generates significant heat, dimensional and shape accuracy may decrease due to thermal deformation, and the machined surface may deteriorate due to grinding burn. Therefore, monitoring the temperature during grinding is important [...] Read more.
Heat generation is a critical issue in grinding. If the grinding point generates significant heat, dimensional and shape accuracy may decrease due to thermal deformation, and the machined surface may deteriorate due to grinding burn. Therefore, monitoring the temperature during grinding is important to obtain ideal machining results. In this research, we develop a new method to measure the grinding surface and grinding wheel surface temperature during in-process machining. The proposed method measures the temperature of the grinding surface through small holes in a rotating grinding wheel. Using this method, we measured the temperature of the grinding surface during the dry grinding of carbon fiber reinforced plastics (CFRP). Temperature of the grinding surface was measured every 1/4 rotation of the grinding wheel at any depth of cut, assuming precision grinding, rough grinding, and high-efficiency grinding. The measurement value changed depending on the temperature measurement position of the infrared thermometer from numerical analysis of the grinding surface temperature. We also found that when the cut depth was small, the temperature, including the surface of the workpiece before machining, was measured at a specific temperature measurement position. The newly developed temperature measurement method was capable of in-process measurement of the grinding surface temperature and of detecting temperature rise when the grinding wheel was clogged. Full article
(This article belongs to the Topic Modern Technologies and Manufacturing Systems)
Show Figures

Figure 1

13 pages, 4768 KiB  
Article
Effects of Magnetic Abrasive Finishing on Microstructure and Mechanical Properties of Inconel 718 Processed by Laser Powder Bed Fusion
by Yunhao Zhao, Jason Ratay, Kun Li, Hitomi Yamaguchi and Wei Xiong
J. Manuf. Mater. Process. 2022, 6(2), 43; https://doi.org/10.3390/jmmp6020043 - 8 Apr 2022
Cited by 6 | Viewed by 3365
Abstract
Surface finishing is challenging in the context of additively manufactured components with complex geometries. Magnetic abrasive finishing (MAF) is a promising surface finishing technology that can refine the surface quality of components with complex shapes produced by additive manufacturing. However, there is insufficient [...] Read more.
Surface finishing is challenging in the context of additively manufactured components with complex geometries. Magnetic abrasive finishing (MAF) is a promising surface finishing technology that can refine the surface quality of components with complex shapes produced by additive manufacturing. However, there is insufficient study regarding the impact of MAF on microstructure–property relationships for additively manufactured builds, which is critical for evaluating mechanical performance. In this work, we studied the effects of different combinations of MAF and heat treatment steps on the microstructure–property relationships of Inconel 718 superalloys made by laser powder bed fusion (LPBF). The application of MAF was found to significantly reduce the surface roughness and refine the grain size of aged alloys. Moreover, MAF was able to increase the alloy elongation, which could be further influenced by the sequence of MAF and different heat treatment steps. The highest elongation could be achieved when MAF was performed between homogenization and aging processes. This work indicates that an effective combination of surface finishing and heat treatment is critical for the improvement of alloy performance. Furthermore, it demonstrates a promising solution for improving the performance of LPBF Inconel 718 by integrating MAF and heat treatment, which provides new perspectives on the post-processing optimization of additively manufactured alloys. Full article
Show Figures

Figure 1

17 pages, 4684 KiB  
Article
Analysis of Spindle AE Signals and Development of AE-Based Tool Wear Monitoring System in Micro-Milling
by Bing-Syun Wan, Ming-Chyuan Lu and Shean-Juinn Chiou
J. Manuf. Mater. Process. 2022, 6(2), 42; https://doi.org/10.3390/jmmp6020042 - 7 Apr 2022
Cited by 13 | Viewed by 3182
Abstract
Acoustic emission (AE) signals collected from different locations might provide various sensitivities to tool wear condition. Studies for tool wear monitoring using AE signals from sensors on workpieces has been reported in a number of papers. However, it is not feasible to implement [...] Read more.
Acoustic emission (AE) signals collected from different locations might provide various sensitivities to tool wear condition. Studies for tool wear monitoring using AE signals from sensors on workpieces has been reported in a number of papers. However, it is not feasible to implement in the production line. To study the feasibility of AE signals obtained from sensors on spindles to monitor tool wear in micro-milling, AE signals obtained from the spindle housing and workpiece were collected simultaneously and analyzed in this study for micro tool wear monitoring. In analyzing both signals on tool wear monitoring in micro-cutting, a feature selection algorithm and hidden Markov model (HMM) were also developed to verify the effect of both signals on the monitoring system performance. The results show that the frequency responses of signals collected from workpiece and spindle are different. Based on the signal feature/tool wear analysis, the results indicate that the AE signals obtained from the spindle housing have a lower sensitivity to the micro tool wear than AE signals obtained from the workpiece. However, the analysis of performance for the tool wear monitoring system demonstrates that a 100% classification rate could be obtained by using spindle AE signal features with a frequency span of 16 kHz. This suggests that AE signals collected on spindles might provide a promising solution to monitor the wear of the micro-mill in micro-milling with proper selection of the feature bandwidth and other parameters. Full article
(This article belongs to the Special Issue Advances in Precision Machining Processes)
Show Figures

Figure 1

13 pages, 4718 KiB  
Article
Flexural Fatigue Test—A Proposed Method to Characterize the Lifetime of Conductor Tracks on Polymeric Substrates
by Simon Petillon, Andrea Knöller, Philipp Bräuer, David Helm, Tobias Grözinger, Sascha Weser, Wolfgang Eberhardt, Jörg Franke and André Zimmermann
J. Manuf. Mater. Process. 2022, 6(2), 41; https://doi.org/10.3390/jmmp6020041 - 1 Apr 2022
Viewed by 2986
Abstract
High quality and long product life are two fundamental requirements for all circuit carriers, including molded interconnect devices (MID), to find application in various fields, such as automotive, sensor technology, medical technology, and communication technology. When developing a MID for a certain application, [...] Read more.
High quality and long product life are two fundamental requirements for all circuit carriers, including molded interconnect devices (MID), to find application in various fields, such as automotive, sensor technology, medical technology, and communication technology. When developing a MID for a certain application, not only the design, but also the choice of material as well as the process parameters need to be carefully considered. A well-established method to evaluate the lifetime of such MID, respective of their conductor tracks, is the thermal shock test, which induces thermomechanical stresses upon cycling. Even though this method has numerous advantages, one major disadvantage is its long testing time, which impedes rapid developments. Addressing this disadvantage, this study focuses on the laser direct structuring of thermoplastic LCP Vectra E840i LDS substrates and the subsequent electroless metallization of the commonly used layer system Cu/Ni/Au to force differences in the conductor tracks’ structure and composition. Performing standardized thermal shock tests alongside with flexural fatigue tests, using a customized setup, allows comparison of both methods. Moreover, corresponding thermomechanical simulations provide a direct correlation. The flexural fatigue tests induce equivalent or even higher mechanical stresses at a much higher cycling rate, thus drastically shorten the testing time. Full article
(This article belongs to the Special Issue Laser-Based Manufacturing II)
Show Figures

Figure 1

16 pages, 5630 KiB  
Article
Hybrid Manufacturing of Aluminium Parts Combining Additive and Conventional Technologies—Mechanical and Thermal Properties
by Eva C. Silva, Josué A. Candiango, Sérgio J. Rodrigues, Álvaro M. Sampaio and António J. Pontes
J. Manuf. Mater. Process. 2022, 6(2), 40; https://doi.org/10.3390/jmmp6020040 - 23 Mar 2022
Cited by 2 | Viewed by 3915
Abstract
Metal additive-manufacturing technologies enable the production of complex geometries. However, high manufacturing costs hinder these technologies being employed in some industries. In this sense, a hybrid strategy is presented in this paper, to achieve the best of additive and subtractive technologies, offering economic [...] Read more.
Metal additive-manufacturing technologies enable the production of complex geometries. However, high manufacturing costs hinder these technologies being employed in some industries. In this sense, a hybrid strategy is presented in this paper, to achieve the best of additive and subtractive technologies, offering economic advantages. AlSi10Mg aluminium powder was deposited on AW-6082 pre-machined substrates and mechanical and thermal properties of these specimens were evaluated considering the application of a stress relief heat treatment. The results were especially good in the compressive mechanical properties and in the thermal properties: compressive properties were improved by up to 27%, and the specific heat capacity and coefficient of thermal expansion were reduced by up to 38%, compared to additively manufactured AlSi10Mg. Therefore, hybrid manufacturing can be a profitable solution (i) in thermal management applications, (ii) when compressive loads are presented, or (iii) to repair damaged parts, providing a circular economy, as presented in a case study of this paper. Full article
(This article belongs to the Special Issue Frontiers in Digital Manufacturing)
Show Figures

Figure 1

13 pages, 19741 KiB  
Article
Top Surface Roughness Modeling for Robotic Wire Arc Additive Manufacturing
by Heping Chen , Ahmed Yaseer and Yuming Zhang 
J. Manuf. Mater. Process. 2022, 6(2), 39; https://doi.org/10.3390/jmmp6020039 - 21 Mar 2022
Cited by 11 | Viewed by 4765
Abstract
Wire Arc Additive Manufacturing (WAAM) has many applications in fabricating complex metal parts. However, controlling surface roughness is very challenging in WAAM processes. Typically, machining methods are applied to reduce the surface roughness after a part is fabricated, which is costly and ineffective. [...] Read more.
Wire Arc Additive Manufacturing (WAAM) has many applications in fabricating complex metal parts. However, controlling surface roughness is very challenging in WAAM processes. Typically, machining methods are applied to reduce the surface roughness after a part is fabricated, which is costly and ineffective. Therefore, controlling the WAAM process parameters to achieve better surface roughness is important. This paper proposes a machine learning method based on Gaussian Process Regression to construct a model between the WAAM process parameters and top surface roughness. In order to measure the top surface roughness of a manufactured part, a 3D laser measurement system is developed. The experimental datasets are collected and then divided into training and testing datasets. A top surface roughness model is then constructed using the training datasets and verified using the testing datasets. Experimental results demonstrate that the proposed method achieves less than 50 μm accuracy in surface roughness prediction. Full article
(This article belongs to the Special Issue Machine Intelligence in Welding and Additive Manufacturing)
Show Figures

Figure 1

12 pages, 4154 KiB  
Article
Punching of Ultra-High-Strength Spring Strips: Evolution of Cutting Edge Radius up to 1,000,000 Strokes for Three Punch Materials
by Sven Winter, Karsten Richter, Elmar Galiev, Matthias Nestler, Verena Psyk and Verena Kräusel
J. Manuf. Mater. Process. 2022, 6(2), 38; https://doi.org/10.3390/jmmp6020038 - 19 Mar 2022
Cited by 2 | Viewed by 3280
Abstract
Punching of ultra-high-strength spring steel causes critical stresses in the tools. Pronounced wear and even spontaneous failure may occur. Wear of the punches influences the quality of the cutting surfaces of the blanked parts, which is predominantly determined by the cutting edge radius. [...] Read more.
Punching of ultra-high-strength spring steel causes critical stresses in the tools. Pronounced wear and even spontaneous failure may occur. Wear of the punches influences the quality of the cutting surfaces of the blanked parts, which is predominantly determined by the cutting edge radius. The radius differs with an increasing number of strokes depending on the punch material. However, there are no studies characterizing the influence of the cutting edge radius on the cutting surface quality on an industrial scale, i.e., considering a very high number of strokes. In the presented study, punches made of high-speed steel, powder metallurgical steel and carbide were used to punch the ultra-high-strength steel 1.4310 (Rm = 1824 MPa) up to 1,000,000 strokes. The experiments were stopped at defined number of strokes, the punches were removed, nondestructively characterized regarding cutting edge radius and wear and reinstalled. It turned out that the radius differed significantly over the number of strokes and, further, varied depending on the punch material. Remarkably, the most low-cost material, precisely the high-speed steel, showed the smallest cutting edge radius of 16 µm and brought the parts with the best cutting surface quality (more than 30% burnish zone) after the maximum number of strokes. The results indicate clearly that the cutting edge radius develops differently for each regarded material and at different number of strokes. Therefore, it is of utmost importance to perform wear tests on different numbers of strokes under industrial conditions. With the knowledge gained, it will be possible to design optimized punches with lower costs and increased lifetime. Full article
Show Figures

Figure 1

17 pages, 9602 KiB  
Article
Adapting the Surface Integrity of High-Speed Steel Tools for Sheet-Bulk Metal Forming
by Wolfgang Tillmann, Dominic Stangier, Alexander Meijer, Eugen Krebs, Alexander Ott, Timo Platt, Nelson Filipe Lopes Dias, Leif Hagen and Dirk Biermann
J. Manuf. Mater. Process. 2022, 6(2), 37; https://doi.org/10.3390/jmmp6020037 - 18 Mar 2022
Cited by 10 | Viewed by 3196
Abstract
New manufacturing technologies, such as Sheet-Bulk Metal Forming, are facing the challenges of highly stressed tool surfaces which are limiting their service life. For this reason, the load-adapted design of surfaces and the subsurface region as well as the application of wear-resistant coatings [...] Read more.
New manufacturing technologies, such as Sheet-Bulk Metal Forming, are facing the challenges of highly stressed tool surfaces which are limiting their service life. For this reason, the load-adapted design of surfaces and the subsurface region as well as the application of wear-resistant coatings for forming dies and molds made of high-speed steel has been subject to many research activities. Existing approaches in the form of grinding and conventional milling processes do not achieve the surface quality desired for the forming operations and therefore often require manual polishing strategies afterward. This might lead to an unfavorable constitution for subsequent PVD coating processes causing delamination effects or poor adhesion of the wear-resistant coatings. To overcome these restrictions, meso- and micromilling are presented as promising approaches to polishing strategies with varying grain sizes. The processed topographies are correlated with the tribological properties determined in an adapted ring compression test using the deep drawing steel DC04. Additionally, the influence of the roughness profile as well as the induced residual stresses in the subsurface region are examined with respect to their influence on the adhesion of a wear-resistant CrAlN PVD coating. The results prove the benefits of micromilling in terms of a reduced friction factor in the load spectrum of Sheet-Bulk Metal Forming as well as an improved coating adhesion in comparison to metallographic finishing strategies, which can be correlated to the processed roughness profile and induced compressive residual stresses in the subsurface region. Full article
(This article belongs to the Special Issue Surface Integrity in Metals Machining)
Show Figures

Figure 1

17 pages, 9521 KiB  
Article
Mechanical Analysis of Parameter Variations in Large-Scale Extrusion Additive Manufacturing of Thermoplastic Composites
by Nevine Tagscherer, André Marcel Bär, Swen Zaremba and Klaus Drechsler
J. Manuf. Mater. Process. 2022, 6(2), 36; https://doi.org/10.3390/jmmp6020036 - 16 Mar 2022
Cited by 11 | Viewed by 3261
Abstract
Large structural parts manufactured by Extrusion Additive Manufacturing (EAM) are limited by strong anisotropy due to insufficient bond formation and reduced molecular entanglement along the layer interface. To understand the correlation between process and material parameters and to enable digital modeling of EAM, [...] Read more.
Large structural parts manufactured by Extrusion Additive Manufacturing (EAM) are limited by strong anisotropy due to insufficient bond formation and reduced molecular entanglement along the layer interface. To understand the correlation between process and material parameters and to enable digital modeling of EAM, the effect of different substrate temperatures and layer heights on tensile strength was investigated. A simple testing methodology for pelletized carbon fiber-filled polyamide 6 was developed. Tensile tests were performed in a full factorial Design of Experiments (DoE) to determine the tensile properties. For bulk simulation, the nominal strength and modulus were also determined based on contact width obtained by optical microscopy. The results demonstrated high anisotropy, with the maximum transverse tensile strength reaching only 27% of the corresponding longitudinal results and the transverse tensile modulus reaching only 20% of its longitudinal value. The effects of varying layer height were less significant than varying substrate temperature. The results support the hypothesis that sufficient transverse tensile strength is achieved between the extrapolated crystallization onset and melt temperature. The methodology of this study can be used as a benchmark method to qualify new thermoplastic polymers for EAM processes and to determine optimal process parameters for improved fusion bonding. Full article
(This article belongs to the Topic Additive Manufacturing)
Show Figures

Figure 1

11 pages, 3475 KiB  
Article
Effect of the Laser Processing Parameters on the Selective Laser Melting of TiC–Fe-Based Cermets
by Himanshu S. Maurya, Lauri Kollo, Marek Tarraste, Kristjan Juhani, Fjodor Sergejev and Konda Gokuldoss Prashanth
J. Manuf. Mater. Process. 2022, 6(2), 35; https://doi.org/10.3390/jmmp6020035 - 13 Mar 2022
Cited by 19 | Viewed by 3186
Abstract
The influence of laser pulse shaping on the formation of TiC-Fe-based cermets with different laser process parameters is investigated. The impact of pulse shaping and laser melting peak power on the microstructural development and mechanical properties of SLM-built parts is addressed. This research [...] Read more.
The influence of laser pulse shaping on the formation of TiC-Fe-based cermets with different laser process parameters is investigated. The impact of pulse shaping and laser melting peak power on the microstructural development and mechanical properties of SLM-built parts is addressed. This research focuses primarily on the process parameters required to produce crack-free components and includes investigations of mechanical properties such as microhardness and fracture toughness. To acquire optimal process parameters, samples were manufactured using pulse shaping technology with varying laser melting peak power and exposure time. The influence of laser melting peak power and pulse shape on microstructure development and phases was analyzed using a scanning electron microscope and X-ray diffraction. Full article
(This article belongs to the Special Issue Powder Metallurgy and Additive Manufacturing/3D Printing of Materials)
Show Figures

Figure 1

25 pages, 5830 KiB  
Article
Optimisation of Operator Support Systems through Artificial Intelligence for the Cast Steel Industry: A Case for Optimisation of the Oxygen Blowing Process Based on Machine Learning Algorithms
by Álvaro Ojeda Roldán, Gert Gassner, Martin Schlautmann, Luis Enrique Acevedo Galicia, Doru Stefan Andreiana, Mikko Heiskanen, Carlos Leyva Guerrero, Fernando Dorado Navas and Alejandro del Real Torres
J. Manuf. Mater. Process. 2022, 6(2), 34; https://doi.org/10.3390/jmmp6020034 - 12 Mar 2022
Cited by 3 | Viewed by 3339
Abstract
The processes involved in the metallurgical industry consume significant amounts of energy and materials, so improving their control would result in considerable improvements in the efficient use of these resources. This study is part of the MORSE H2020 Project, and it aims to [...] Read more.
The processes involved in the metallurgical industry consume significant amounts of energy and materials, so improving their control would result in considerable improvements in the efficient use of these resources. This study is part of the MORSE H2020 Project, and it aims to implement an operator support system that improves the efficiency of the oxygen blowing process of a real cast steel foundry. For this purpose, a machine learning agent is developed according to a reinforcement learning method suitable for the dynamics of the oxygen blowing process in the cast steel factory. This reinforcement learning agent is trained with both historical data provided by the company and data generated by an external model. The trained agent will be the basis of the operator support system that will be integrated into the factory, allowing the agent to continue improving with new and real experience. The results show that the suggestions of the agent improve as it gains experience, and consequently the efficiency of the process also improves. As a result, the success rate of the process increases by 12%. Full article
Show Figures

Figure 1

16 pages, 6099 KiB  
Article
A Realistic Full-Scale 3D Modeling of Turning Using Coupled Smoothed Particle Hydrodynamics and Finite Element Method for Predicting Cutting Forces
by Nishant Ojal, Ryan Copenhaver, Harish P. Cherukuri, Tony L. Schmitz, Kyle T. Devlugt and Adam W. Jaycox
J. Manuf. Mater. Process. 2022, 6(2), 33; https://doi.org/10.3390/jmmp6020033 - 11 Mar 2022
Cited by 4 | Viewed by 2969
Abstract
Computational modelling is an effective technique for understanding the complex physics of machining. Large deformations, material separation, and high computational requirements are the key challenges faced while simulating machining. This work introduces a full-scale three-dimensional model of turning operations using a combined approach [...] Read more.
Computational modelling is an effective technique for understanding the complex physics of machining. Large deformations, material separation, and high computational requirements are the key challenges faced while simulating machining. This work introduces a full-scale three-dimensional model of turning operations using a combined approach based on the Smoothed Particle Hydrodynamics (SPH) and Finite Element (FE) methods. By exploiting the advantages of each method, this approach leads to high-fidelity coupled SPH-FE machining models. Cutting forces and chip morphology are the primary results of interest. The machining models are validated with the results of turning experiments. Two-dimensional machining model underpredicts the cutting force and feed force by approximately 49% and 70%, respectively. Moreover, passive force cannot be predicted using the two-dimensional model. On the other hand, with the three-dimensional models developed in this manuscript, the difference between the total simulated force and experimentally measured force is ∼17%. The chip morphologies correlate with experiments in terms of the direction of the chip movement and the “long” continuous chips observed while turning Al 6061. This work expands the realm of machining simulations from two-dimensional orthogonal machining or sectional three-dimensional model to a full-scale realistic simulation. The encouraging simulation results show the potential to study more complex phenomena, such as machining stability and tool path modulation. Full article
Show Figures

Figure 1

16 pages, 7466 KiB  
Article
Influence of the L-PBF Process Atmosphere on the Microstructure and Tensile Properties of AISI 318LN Duplex Stainless Steel
by Markus Mirz, Simone Herzog, Christoph Broeckmann and Anke Kaletsch
J. Manuf. Mater. Process. 2022, 6(2), 32; https://doi.org/10.3390/jmmp6020032 - 10 Mar 2022
Cited by 13 | Viewed by 3583
Abstract
Duplex stainless steels (DSSs) have excellent mechanical properties, owing to their austenitic-ferritic microstructure. The phase equilibrium strongly depends on solidification conditions and chemical composition, where elemental nitrogen significantly stabilizes the austenitic phase. When DSSs are processed by laser powder bed fusion (L-PBF) under [...] Read more.
Duplex stainless steels (DSSs) have excellent mechanical properties, owing to their austenitic-ferritic microstructure. The phase equilibrium strongly depends on solidification conditions and chemical composition, where elemental nitrogen significantly stabilizes the austenitic phase. When DSSs are processed by laser powder bed fusion (L-PBF) under an argon atmosphere, the rapid cooling rates result in an undesirable fully ferritic microstructure. To better understand the microstructure formation, this study examined the influence of the L-PBF process atmosphere on the porosity, microstructure, and mechanical properties of DSS AISI 318LN. Gaseous argon and nitrogen were used as a protective atmosphere, and specimens were analyzed in the as-built and post-processed conditions via optical and electron microscopy, electron backscatter diffraction, and tensile testing. Specimens processed under a nitrogen atmosphere showed a lower initial density in the as-built conditions, and tended to form more lack-of-fusion and gas pores compared to specimens processed under argon. The different defect types in nitrogen-processed specimens were still present after solution-annealing and quenching, leading to a 13% lower tensile strength and 43% lower elongation at fracture. Differences in phase equilibrium caused by the process atmosphere could not be established. All differences in porosity can be minimized by hot isostatic pressing, thus resulting in comparable mechanical properties of argon- and nitrogen-processed specimens. Full article
(This article belongs to the Special Issue Advances in Metal Additive Manufacturing/3D Printing)
Show Figures

Figure 1

10 pages, 5343 KiB  
Article
Nozzle Condition Monitoring System Using Root Mean Square of Acoustic Emissions during Abrasive Waterjet Machining
by Jeong-Uk Kim, Roh-Won Kim, Sung-Ryul Kim, Hyun-Hee Kim and Kyung-Chang Lee
J. Manuf. Mater. Process. 2022, 6(2), 31; https://doi.org/10.3390/jmmp6020031 - 7 Mar 2022
Cited by 6 | Viewed by 3558
Abstract
Machining of difficult-to-cut materials such as titanium alloys, stainless steel, Inconel, ceramic, glass, and carbon fiber-reinforced plastics used in the aerospace, automobile, and medical industries is being actively researched. One non-traditional machining method involves the use of an abrasive waterjet, in which ultra-high-pressure [...] Read more.
Machining of difficult-to-cut materials such as titanium alloys, stainless steel, Inconel, ceramic, glass, and carbon fiber-reinforced plastics used in the aerospace, automobile, and medical industries is being actively researched. One non-traditional machining method involves the use of an abrasive waterjet, in which ultra-high-pressure water and abrasive particles are mixed and then ejected through a nozzle, and the thin jet stream cuts materials. The nozzle greatly affects the machining quality, as does the cutting tool of general machining, so it is very important to monitor the nozzle condition. If the nozzle is damaged or worn, or if the bore size increases or the bore becomes clogged with abrasive, the material may not be cut, or the surface quality of the cut may deteriorate. Here, we develop a nozzle monitoring system employing an acoustic emission sensor that detects the nozzle condition in real time. Full article
(This article belongs to the Topic Modern Technologies and Manufacturing Systems)
Show Figures

Figure 1

27 pages, 6045 KiB  
Article
Benchmarking of 316L Stainless Steel Manufactured by a Hybrid Additive/Subtractive Technology
by Sheida Sarafan, Priti Wanjara, Javad Gholipour, Fabrice Bernier, Mahmoud Osman, Fatih Sikan, Josh Soost, Robert Amos, Prakash Patnaik and Mathieu Brochu
J. Manuf. Mater. Process. 2022, 6(2), 30; https://doi.org/10.3390/jmmp6020030 - 5 Mar 2022
Cited by 9 | Viewed by 5590
Abstract
This research study investigated the hybrid processing of 316L stainless steel using laser powder bed (LPB) processing with high-speed machining in the same build envelope. Benchmarking at four laser powers (160 W, 240 W, 320 W, and 380 W) was undertaken by building [...] Read more.
This research study investigated the hybrid processing of 316L stainless steel using laser powder bed (LPB) processing with high-speed machining in the same build envelope. Benchmarking at four laser powers (160 W, 240 W, 320 W, and 380 W) was undertaken by building additively with machining passes integrated sequentially after every ten deposited layers, followed by the final finishing of select surfaces. The final geometry was inspected against the computer-aided design (CAD) model and showed deviations smaller than 280 µm for the as-built and machined surfaces, which demonstrate the good efficacy of hybrid processing for the net-shape manufacturing of stainless steel products. The arithmetic average roughness values for the printed surfaces, Ra (linear) and Sa (surface), were 11.4 um and 14.9 um, respectively. On the other hand, the vertical and horizontal machined surfaces had considerably lower roughness, with Ra and Sa values ranging between 0.33 µm and 0.70 µm. The 160 W coupon contained layered, interconnected lack of fusion defects which affected the density (7.84 g·cm−3), yield strength (494 MPa), ultimate tensile strength (604 MPa), Young’s modulus (175 GPa), and elongation at break (17.3%). By contrast, at higher laser powers, near-full density was obtained for the 240 W (7.96 g·cm−3), 320 W (7.94 g·cm−3), and 380 W (7.92 g·cm−3) conditions. This, combined with the isolated nature of the small pores, led to the tensile properties surpassing the requirements stipulated in ASTM F3184—16 for 316L stainless steel. Full article
(This article belongs to the Special Issue Hybrid Manufacturing)
Show Figures

Figure 1

9 pages, 2178 KiB  
Communication
Boronizing of CoCrFeMnNi High-Entropy Alloys Using Spark Plasma Sintering
by Hiroaki Nakajo and Akio Nishimoto
J. Manuf. Mater. Process. 2022, 6(2), 29; https://doi.org/10.3390/jmmp6020029 - 27 Feb 2022
Cited by 15 | Viewed by 3137
Abstract
In this study, we investigated the formation of a protective coating on a face-centered cubic high-entropy alloy (HEA). The coating was formed by a diffusion coating method. In the conventional diffusion coating method, the degradation of the mechanical properties of the base material [...] Read more.
In this study, we investigated the formation of a protective coating on a face-centered cubic high-entropy alloy (HEA). The coating was formed by a diffusion coating method. In the conventional diffusion coating method, the degradation of the mechanical properties of the base material owing to prolonged high-temperature treatment is a major issue. Therefore, we formed a ceramic layer using spark plasma sintering (SPS), which suppresses grain growth with rapid heating and enables fast, low-temperature processing. The objective of this study was to form borides on the surface of CoCrFeMnNi HEAs using the SPS method and to investigate their properties. A CoCrFeMnNi HEA prepared by the casting method was used as the base material, and a powdered mixture of B4C and KBF4 was used as the boron source. The analysis of the surfaces of the SPS-treated samples revealed the formation of M2B, MB, and Mn3B4-type borides on the HEA surface. The surface hardness was 2000–2500 HV owing to the formation of a ceramic layer on the HEA surface, and elemental analysis showed that certain elements exhibited characteristic diffusion behaviors. Full article
Show Figures

Figure 1

16 pages, 9620 KiB  
Article
Spark Plasma Sintering of Electric Discharge Machinable 1.5Yb-1.5Sm-TZP-WC Composites
by Ella Walter, Maximilian Rapp and Frank Kern
J. Manuf. Mater. Process. 2022, 6(2), 28; https://doi.org/10.3390/jmmp6020028 - 24 Feb 2022
Cited by 1 | Viewed by 2542
Abstract
Electrically conductive zirconia tungsten carbide composites are attractive materials for manufacturing precision components by electrical discharge machining due to their high strength, toughness and electrical conductivity. In this study, nanocomposite ceramics with a ytterbia samaria co-stabilized zirconia 1.5Yb-1.5Sm-TZP matrix and 24–32 vol.% tungsten [...] Read more.
Electrically conductive zirconia tungsten carbide composites are attractive materials for manufacturing precision components by electrical discharge machining due to their high strength, toughness and electrical conductivity. In this study, nanocomposite ceramics with a ytterbia samaria co-stabilized zirconia 1.5Yb-1.5Sm-TZP matrix and 24–32 vol.% tungsten carbide dispersion were manufactured by spark plasma sintering (SPS) at 1400 °C for 15 min at 60 MPa pressure. The materials exhibited high strengths of 1300–1600 MPa, a moderate fracture resistance of 6 MPa√m and an ultrafine microstructure with grain sizes in the 150 nm range. Scanning electron microscopy and RAMAN spectroscopy revealed the in situ formation of carbon during the SPS process and carbon formation scales with tungsten carbide content, and this apparently impedes bending strength. Full article
Show Figures

Figure 1

22 pages, 13988 KiB  
Article
Improvement of Cooling Effect and Dimensional Accuracy of Wire and Arc Additive Manufactured Magnesium Alloy by Active-Cooling-Based Contacting Copper Blocks
by Hideaki Nagamatsu and Hiroyuki Sasahara
J. Manuf. Mater. Process. 2022, 6(2), 27; https://doi.org/10.3390/jmmp6020027 - 24 Feb 2022
Cited by 11 | Viewed by 4141
Abstract
Wire and arc additive manufacturing (WAAM) employing a magnesium (Mg) alloy is superior in terms of safety, energy efficiency, and deposition rate when compared with a process that utilizes lasers and powder materials. However, problems with WAAM employing an Mg alloy include poor [...] Read more.
Wire and arc additive manufacturing (WAAM) employing a magnesium (Mg) alloy is superior in terms of safety, energy efficiency, and deposition rate when compared with a process that utilizes lasers and powder materials. However, problems with WAAM employing an Mg alloy include poor dimensional accuracy due to low viscosity of the molten Mg alloy. In addition, since Mg alloys cause a combustion reaction with water, an effective cooling method, such as direct water cooling, cannot be applied. In this study, a solid contact-based active cooling method employing copper blocks with high thermal conductivity was proposed to improve the dimensional accuracy and cooling efficiency of fabricated objects using AZ31. Moreover, the proposed method renders it possible to fabricate a wall structure with high flatness as the molten AZ31 solidifies upon direct contact with the flat surface of copper blocks. In addition, the copper blocks harboring an internal water circulation system achieved a higher cooling efficiency and shortened the interval cooling time between the deposition of subsequent layers. Meanwhile, it was discovered that the arc deflected toward the copper blocks, not onto the substrate or the previous layer when the wire tip approached too close to the blocks. Full article
(This article belongs to the Topic Additive Manufacturing)
Show Figures

Figure 1

Previous Issue
Next Issue
Back to TopTop